I often make prototype PCBs on my LitePlacer pick & place machine. The SMT parts usually come packaged as cut tape, as I do not require large enough quantities to justify buying full reels.
In order to make the production process more efficient, I needed „feeders“ for those tape strips which met the following objectives:
- support both paper tapes and embossed plastic tapes
- support different tape widths; at least 8mm and 12mm and some trays for loose components (e.g. TQFP-44)
- add / remove tapes easily (at least a lot easier than peeling them from double-sided tape tacked to the table…)
- hold tapes in place without much vibration (so tiny parts do not jump from their pockets)
- allow downlooking camera on PnP head to detect sprocket holes (if needed for CV)
- leave enough room to peel-off the cover tape once everything is in place
- organize multiple feeders on one tray with fixed positions in a grid
The last objective might be the most important. Per job I only want to setup the tray and teach the machine part locations once. Afterwards, the process of loading parts should be easily repeatable and thus significantly reduce manual effort.
I experimented with several designs and finally came up with one that works good enough for my purposes:

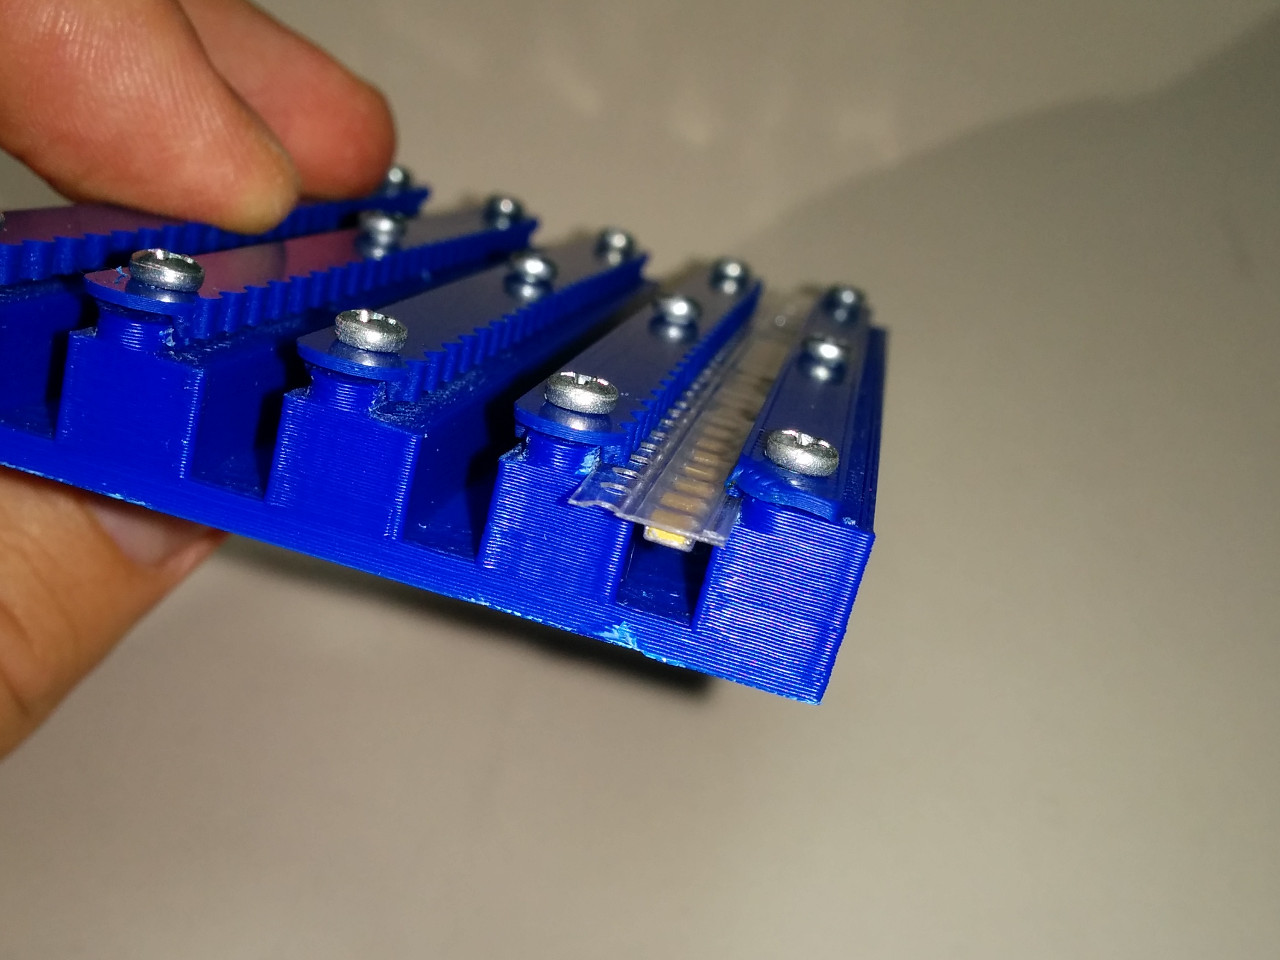
My system consists of feeder blocks each measuring 98mm x 58mm. Multiple feeder blocks can be arranged on a tray.
Each block contains neodym magnets so it can easily be attached to any magnetic surface. To allow for repeatable positioning, the blocks also feature holes for 3mm centroid pins on the bottom side. The pins are designed to mate a 10 x 10mm grid of holes.

The feeder blocks come in different designs for different kinds of tape. The lanes for tape strips are layed out in a 8mm grid, so I can make blocks which hold 4x 8mm tape, 3x 12mm and so on. This grid makes the location of the next tape predictable per tray. Using standard tapes (4mm part pitch) each lane can take up 24 parts.
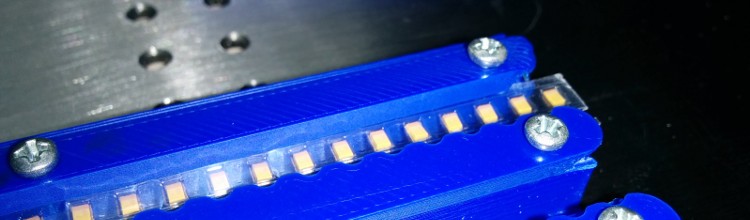
The tapes are being held down by U-shaped lids which are screwed to the feeder block. The pressure can be adjusted to hold the tapes in place firmly.
I made different versions for paper tape (about 0.8mm thick) and embossed plastic tape (about 0.1 – 0.2mm thick) – the versions for plastic tape have a cutout which should fit most parts.
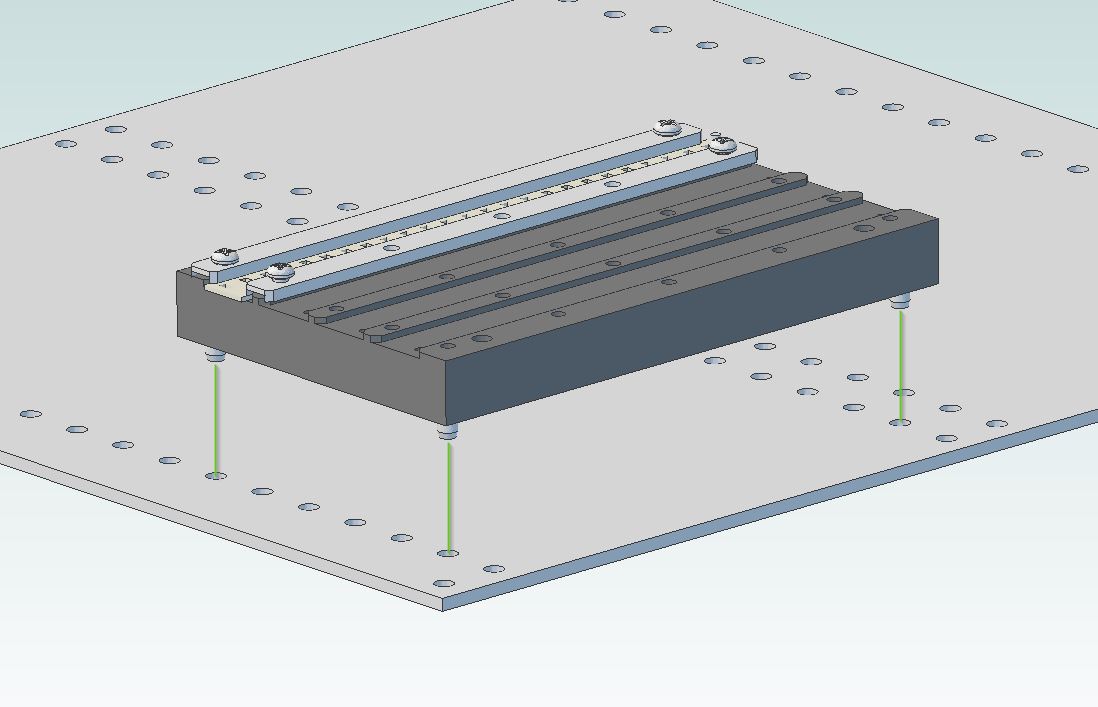
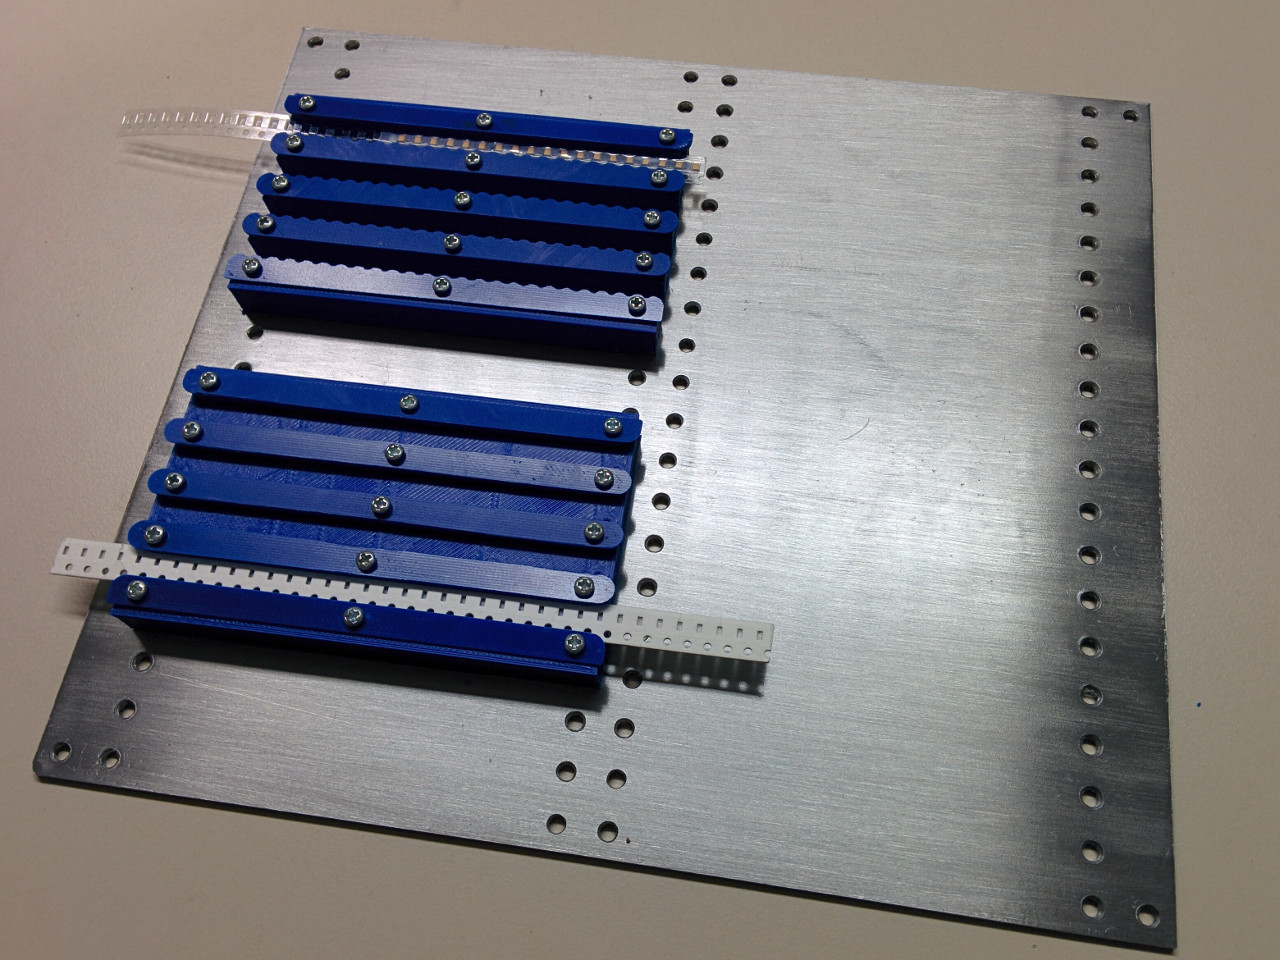
My default tray measures 220mm x 200mm and takes 6 feeder blocks. I can fit 3 of those trays into the working area of my PnP which is usually enough parts for a small batch of boards.
The tray again has holes for centroid pins to make positioning the tray repeatable as well.
I am sharing the STL files for the 3D-printed parts and a DXF for the tray under CC BY-NC-SA 4.0 license.
Download the package as a ZIP-file here:
Instructions
I printed the feeder blocks and lids from ABS. I made the first version from black filament but later realized that this gives little contrast when using parts from dark plastic tape; so I switched to blue which works well if you care about computer vision and sprocket hole detection. I think green might also be a good choice. If CV is not important in your case, print in any color you like 🙂
The parts are designed to print best with a 0.4mm nozzle.The archive contains different block layouts and for each layout a version with and without lilypads (to enhance bed adhesion if needed).
For the feeder blocks I used the following slicer settings: Layer Height = 0.2mm, Infill = 20%, Shell = 1.2mm, Top / Bottom = 1mm
Please mind that ABS shrinks quite a bit. I suggest to print one sample first and measure it, e.g. horizontal centroid hole distance should be exactly 90mm center to center. Then, calculate a scaling factor and apply it in your slicer. Printing FormFutura Easy Fill ABS on my Ultimaker2 I have to apply a scaling factor of 1.009 in Cura.
The lids come in two version; the one prefixed with „_cutouts“ leaves the sprocket holes visible in case you want to use camera + CV to detect those. For the lids, I used the following settings: Layer Height = 0.1mm, Infill = 100%
I had the trays laser cut from magnetic, stainless steel (EN 1.4016). If you have a CNC mill capable of cutting steel you could also make the trays yourself; even a drill press might work if you don’t mind the tedious work.
In addition, you will need the following material to complete the feeders:
- Neodym magnet, cylindrical, 5mm diameter, 4mm tall; 4x per feeder block
- Cyanacrylate or 2k-epoxy glue to fix magnets
- Centroid pin, 3mm diamter, length of 6mm, tapered on one side (e.g Misumi SXKS-D3-L6); 2x – 3x (!) per feeder block
- Panhead screws for plastics, 2.2mm x 6mm; 12x per 4-lane feeder block; 9x per 3-lane, etc.
- Optional: Index pin to fix tapes in place, 1.5mm diameter; 1x per lane
If you do not own a 3D printer but want this part, I might be able to print one for you and sell you the finished product.
Please e-mail me at impressum@malte-randt.de if you are interested.
If this helped you, feel free to buy me some coffee.